Following are the steps to set up Oshine Theme and importing a demo on your WordPress website. You can watch this video that explains the theme installation or read the below documentation.
Step 1: Extracting the Oshine Buyers Package Zip #
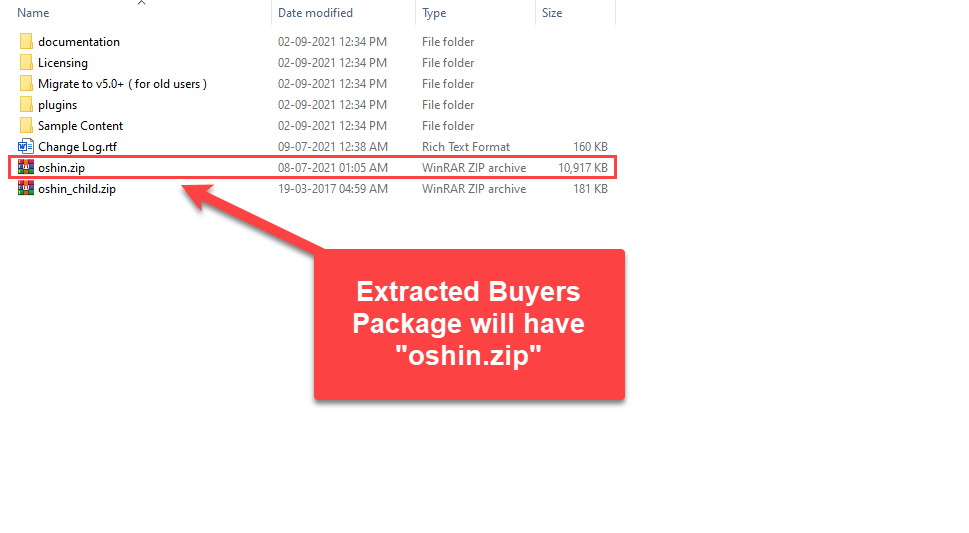
After you’ve purchased the Oshine Theme for Envato (Themeforest) you need to download the Oshine Theme Buyers package on your system. After downloading the package, extract it to your system, it will comprise of many files and folders. You will need the “oshin.zip” file.
Step 2: Installing Oshine #
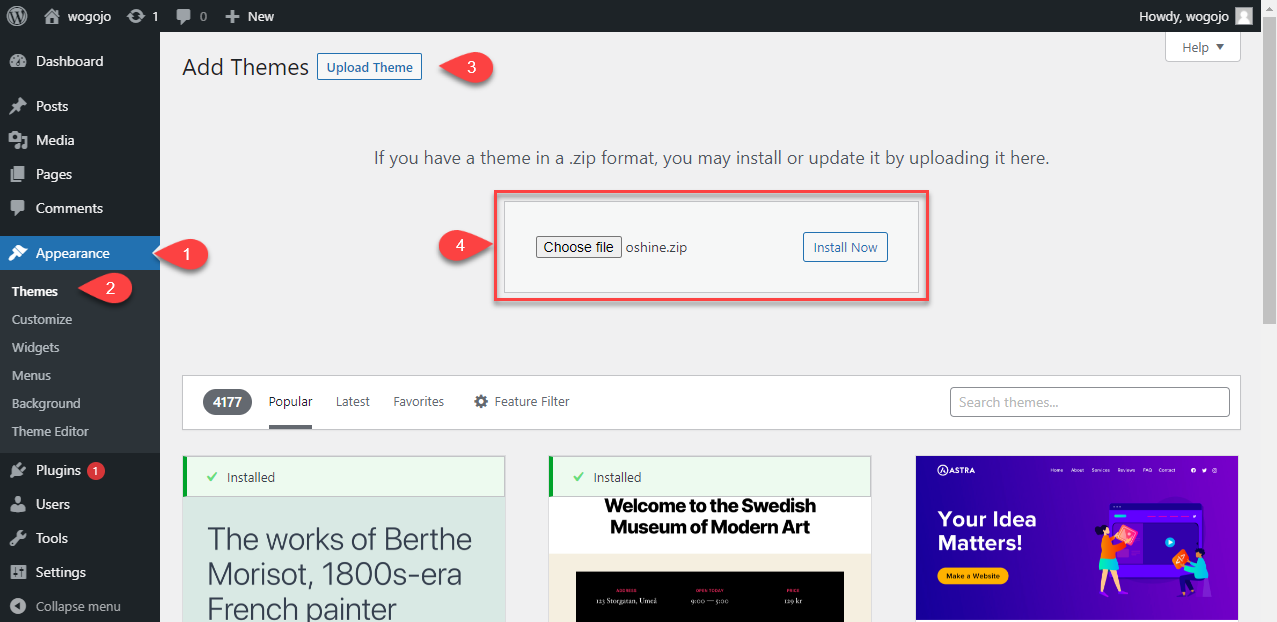
Now, login to your WordPress website and go to Appearance >Themes> Add New > Upload Theme, and select the Oshin.zip file from your system, and click on “Install Now”.
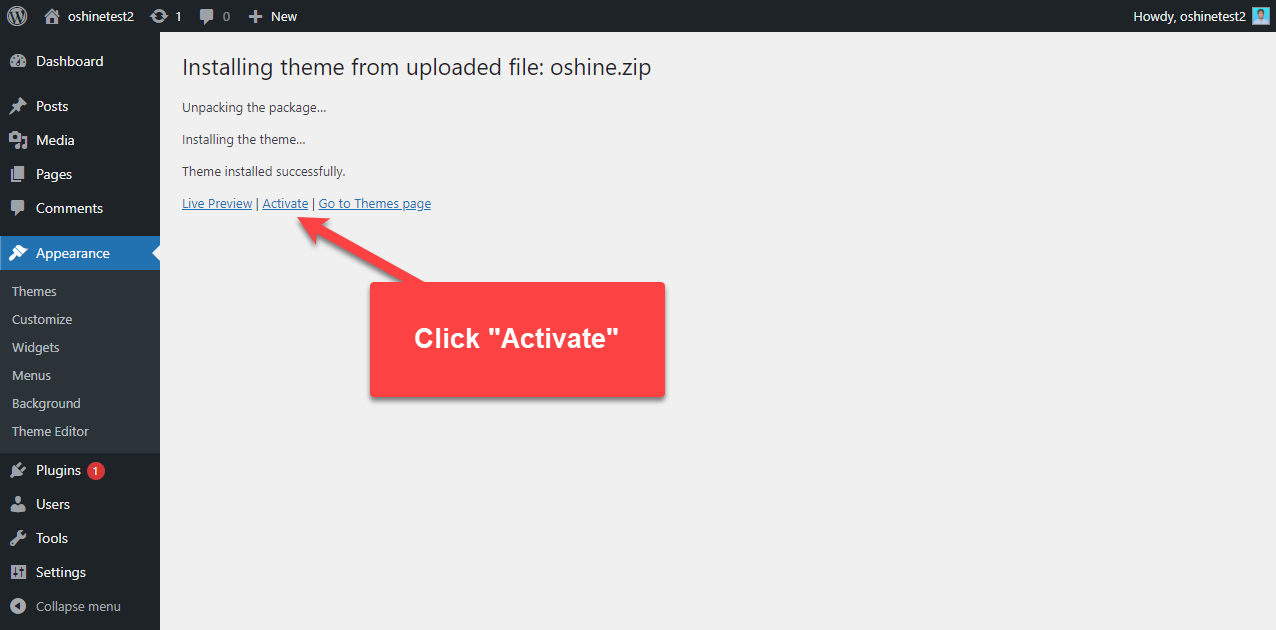
After successful installation, you need to click on the Activate link, to activate your Oshine Theme.
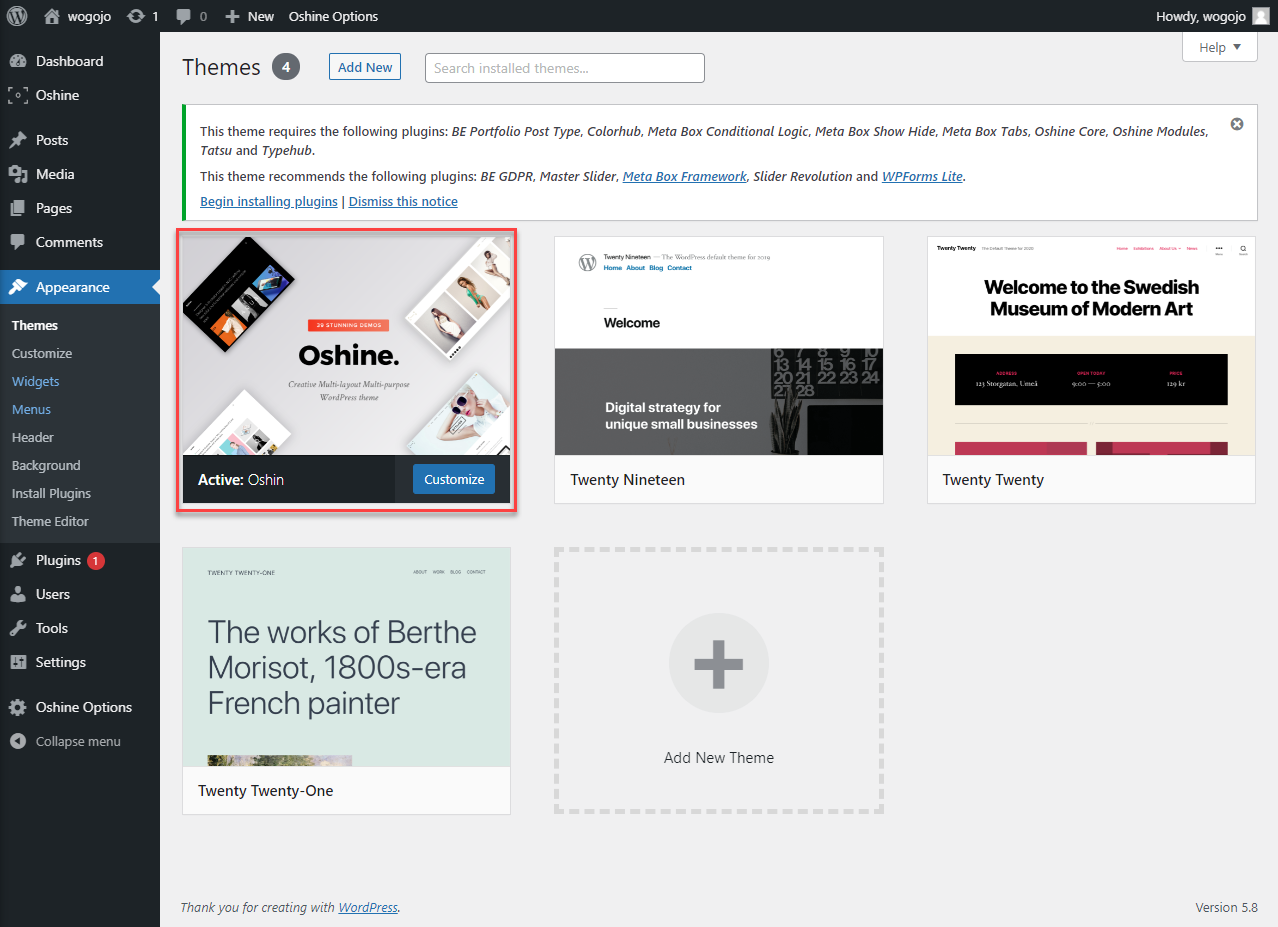
After activating you will see the Oshine (Oshin) theme in your website’s theme section.
Step 3: Theme Setup #
After successful theme installation you will be taken to the Oshine Theme menu, if not you can manually click on the “Oshine” Menu on the WordPress sidebar and begin the setup process.
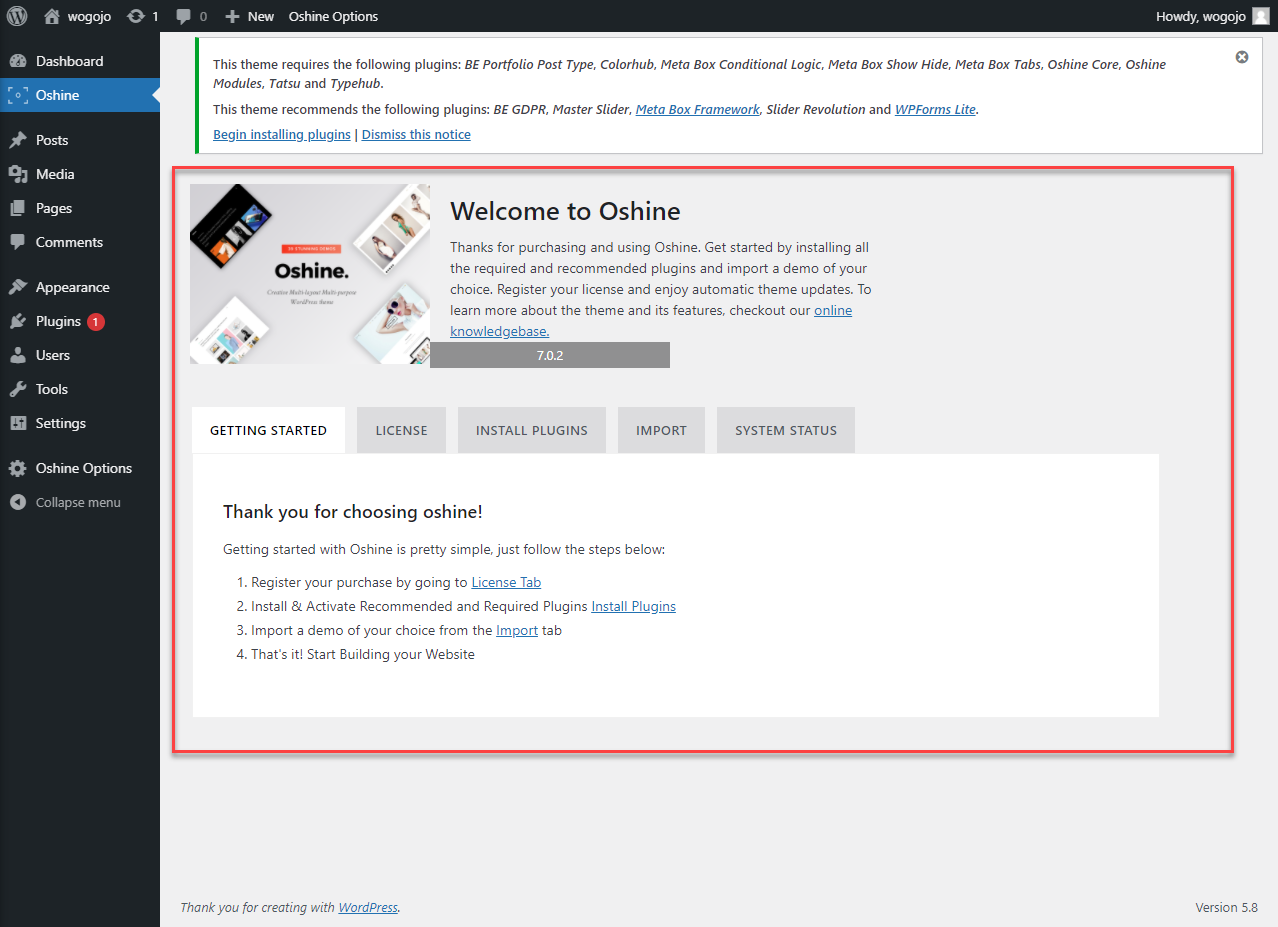
You will be greeted with a Welcome screen that consists of various tabs like Getting Started, License, Install Plugins, Import, and System Status.
Step 4: Adding License #

Get Theme Purchase Code #
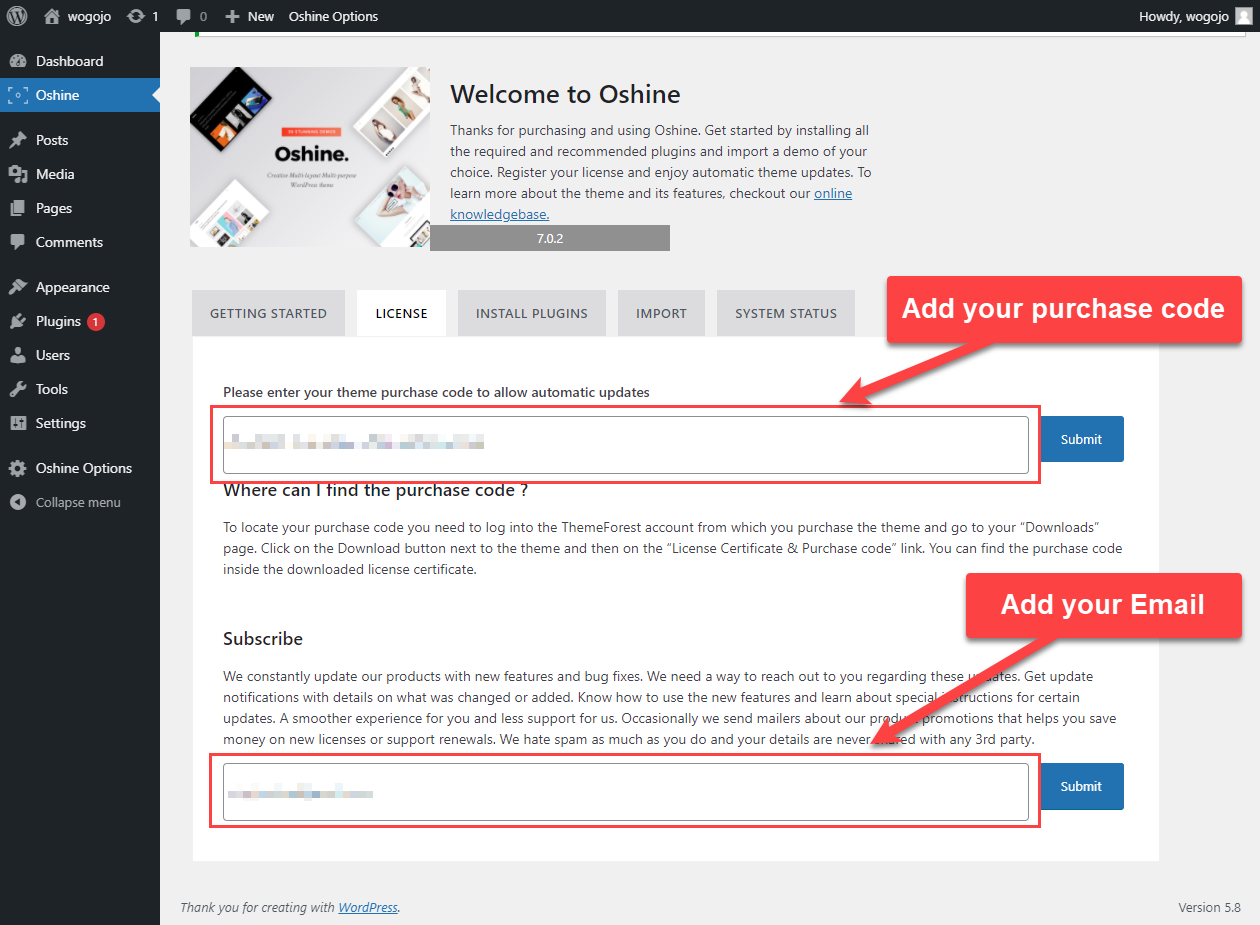
You can get your theme purchase code by logging into your account in ThemeForest and downloading the license certificate and the purchase code in pdf or text format. Copy the purchase code from the downloaded document.
Add Purchase Code #
Paste your unique Purchase code which you had copied earlier under the license tab in the purchase code text-box and hit Submit to save.
Subscribe Email Newsletter #
After you’ve entered the purchase code, you can now enter your email to subscribe and receive update notifications and product promotions.
Step 5: Installing Plugins #
Next, move to the Install Plugins tab, as you might already know that the Oshine theme comes bundled with multiple premium plugins that are required for the smooth functioning of the theme. Hence, we need to install all these plugins before importing any demo.
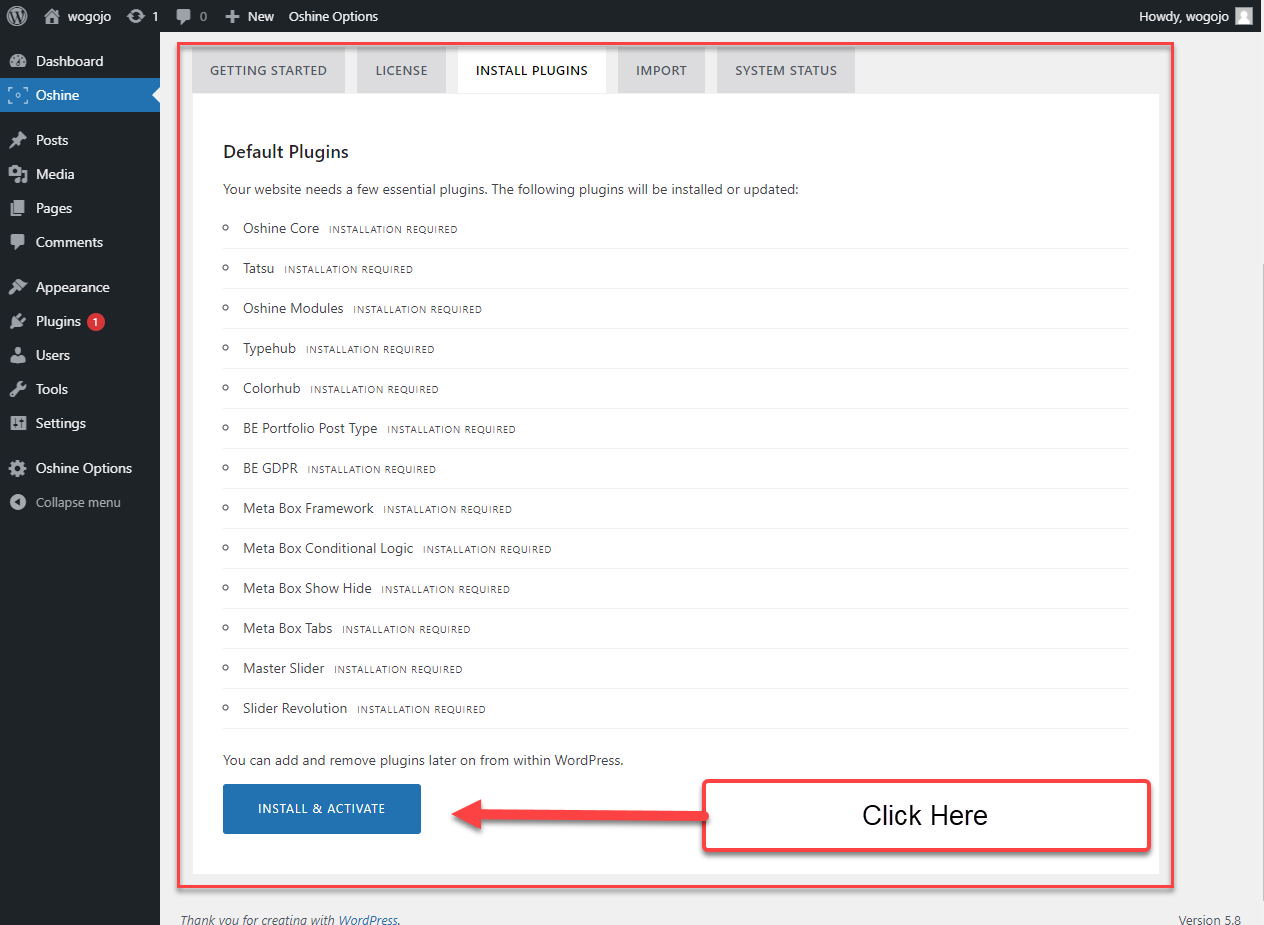
So, to install all the plugins we need to hit the Install & Activate button and all the essential plugins will be downloaded and installed within a few minutes.
Step 6: Importing Demo #
After the plugins have been successfully installed you can move to the next step that is importing a demo. Oshine theme comes with multiple pre-built demos, you can decide on a demo that will be the best suit for your website and import it.
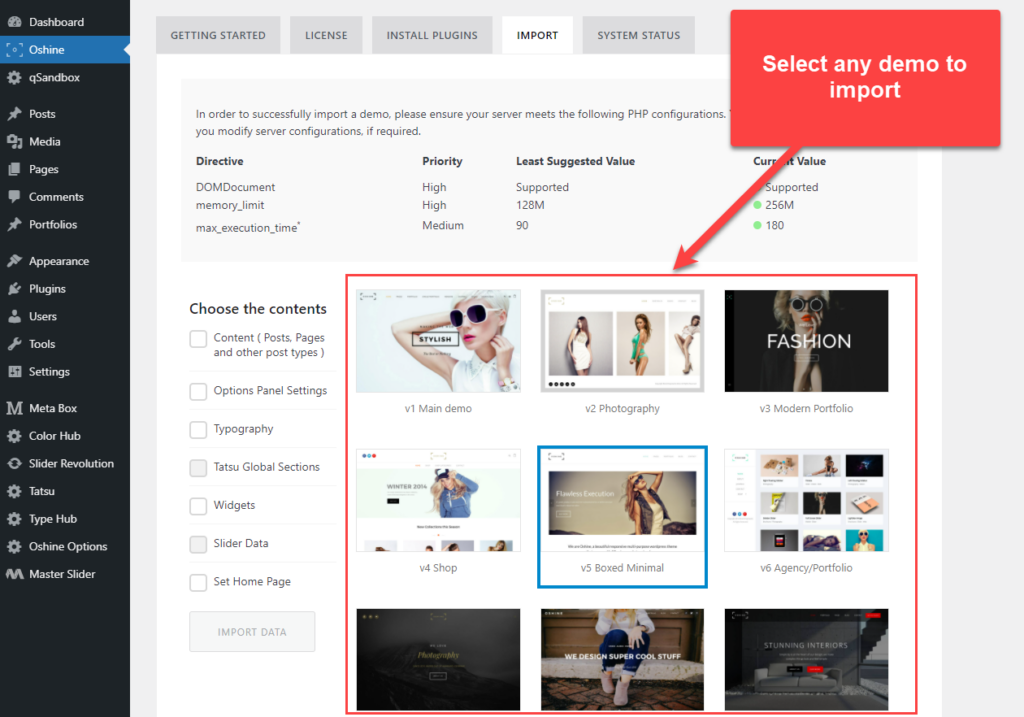
Now, select a demo to import and choose the contents to import. Note, that not all demos are the same, therefore you might witness some content would be available for one and unavailable for another. So, there is nothing to worry about, and it totally depends on the design of the demo.
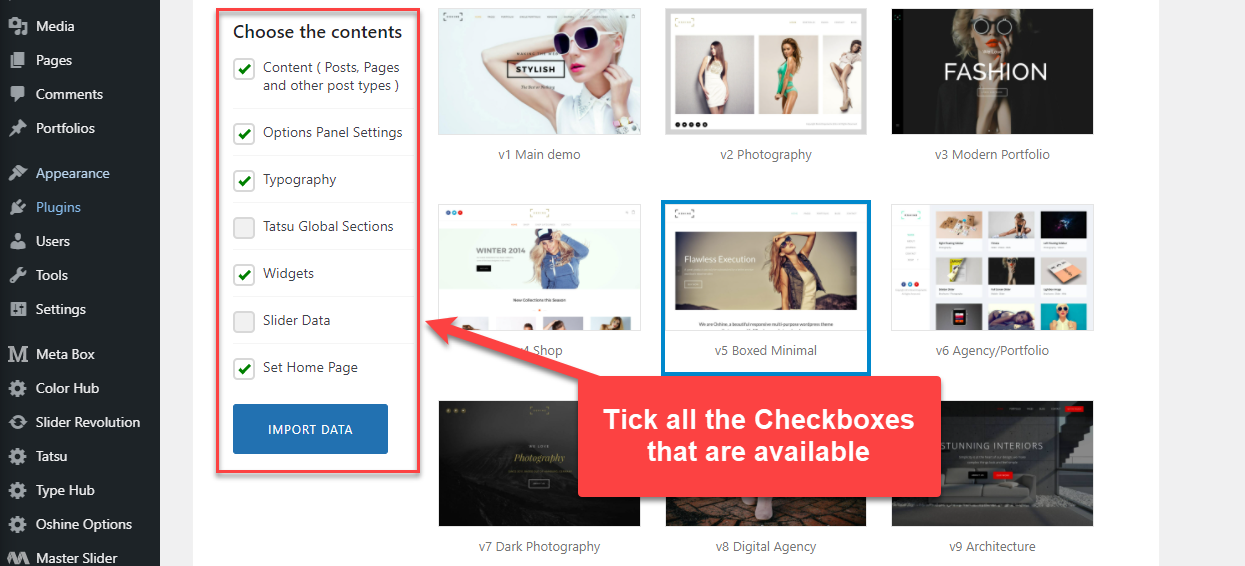
After, selecting the contents click on “Import Data”.
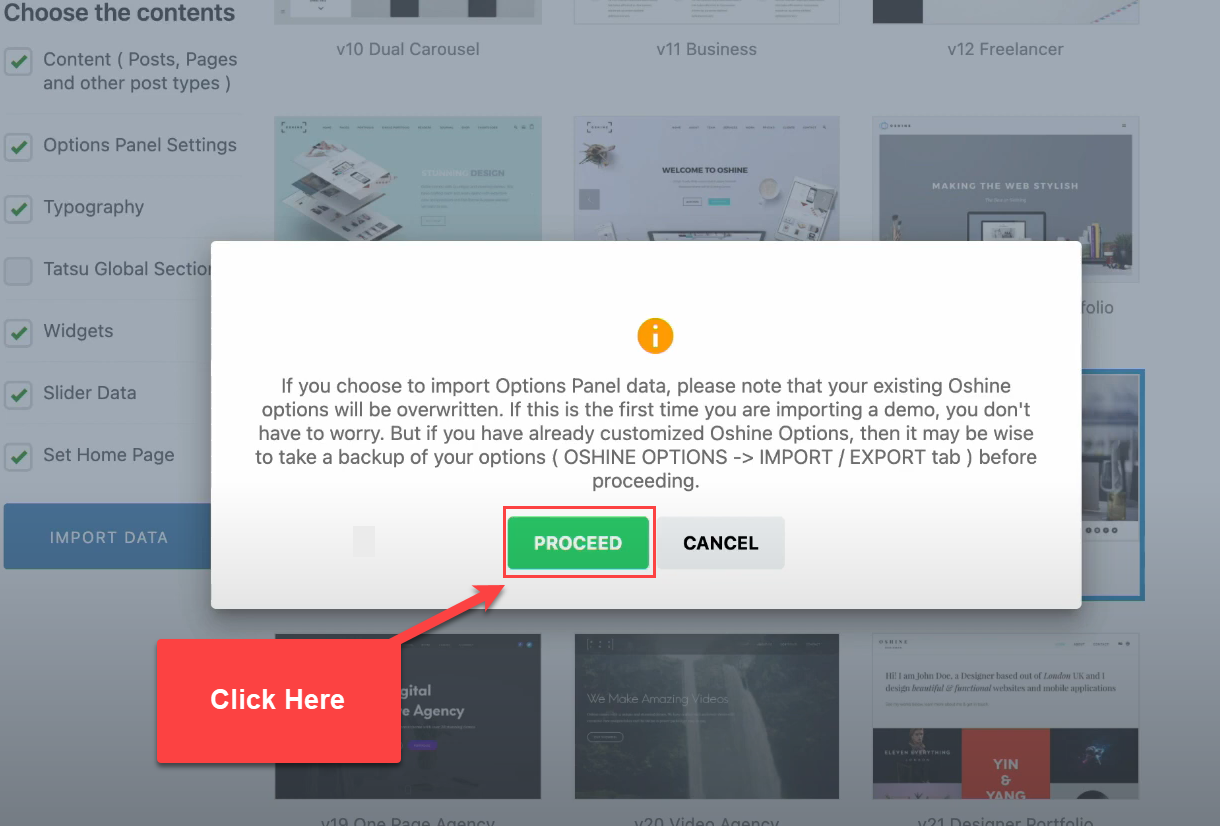
You will be presented with a note asking you to take a backup of your theme before importing Oshine, click on “Proceed” to move forward. It will take a few minutes to install all the contents.
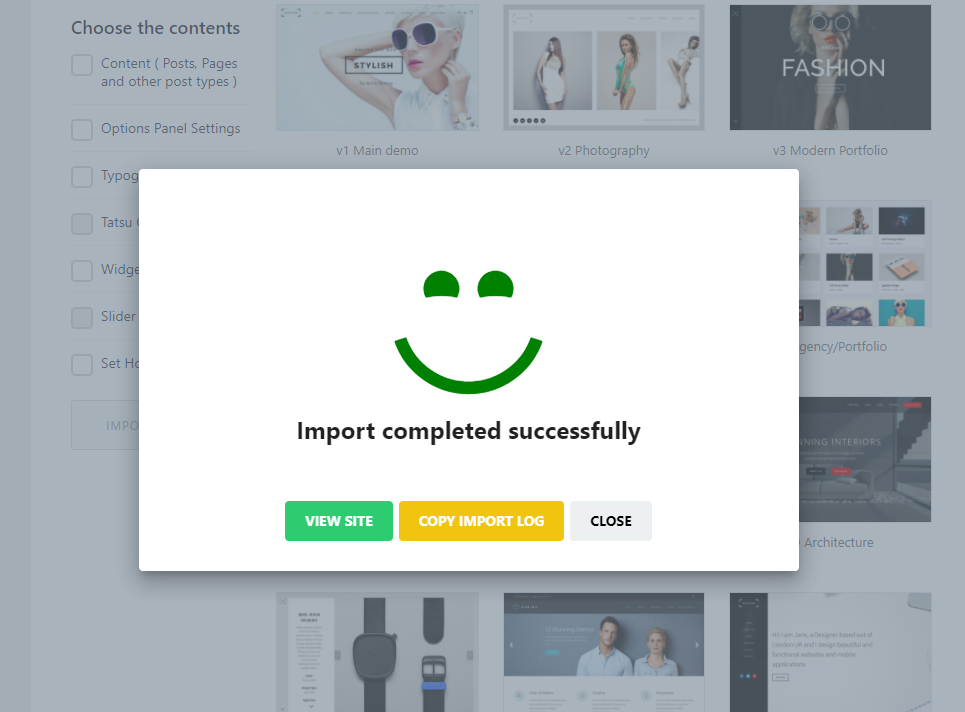
After the file is imported successfully you will be notified about it.
Next, you can hit the “View Site” button and view the newly installed Oshine theme. Now you can use the site as you normally would, customize the theme as per your requirement and business needs.
Note: If you encounter any issue in the theme setup process, raise a support ticket, and experienced support personnel will get back to you.


