- 1. HEADER LAYOUT –
- 2. SITE LAYOUT –
- Border Layout Settings :
- 3. BORDER BG –
- 4. BORDER WIDTH –
- 8. DISPLAY COMMENTS ON PAGES –
- 9. DISABLE CSS ANIMATION IN MOBILE DEVICES –
- 10. DISABLE DYNAMIC COLOR CHANGE ON SLIDER REVOLUTION –
- 11. DISABLE BACK TO TOP BUTTON – Click to Preview the Back to Top Button
- 12. FORM FIELD STYLE –
- 13. BUTTON SHAPE
- 14. CUSTOM SIDEBARS :
- 15. INSTAGRAM ACCESS TOKEN –
- 16. GOOGLE MAP API KEY –
- 17. CDN ADDRESS
This Panel has the options related to the entire site’s Layout and Settings. Each of the Option is explained below with relevant screenshots and explanations.
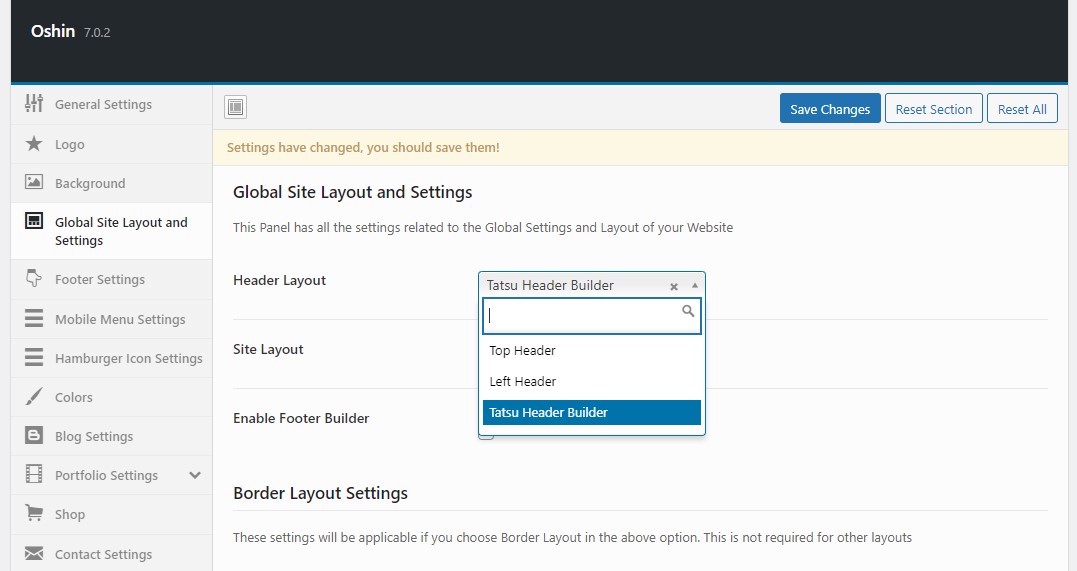
1. HEADER LAYOUT – #
There is three broad classifications of the Header Layout, namely – TOP and LEFT and Header Builder.
Other settings specific to the Header should be configured under the Top Header Settings and Left Header Settings Panel respectively. Tatsu Header Settings can be found inside the Tatsu Menu on the admin sidebar.
Learn more about Tatsu Builder from the official Tatsu Docs

2. SITE LAYOUT – #
There are four kinds of Site Layout – Wide , Boxed , Border and Header Top Border Layout. Click below to preview each of them

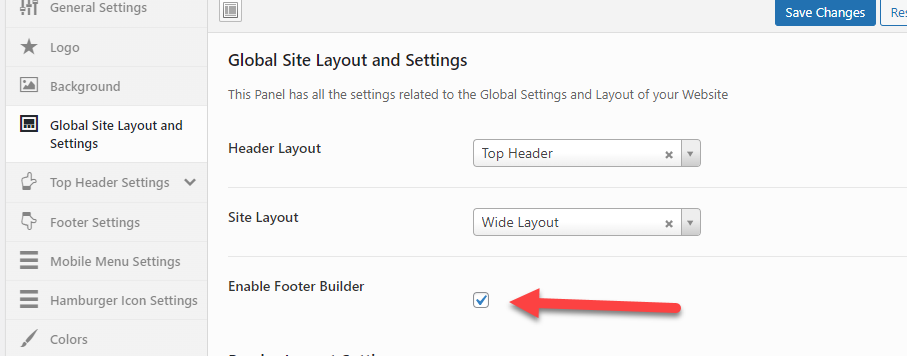
Footer Builder:
Once Enabled the footer builder option gets enabled in Tatsu that enables you to set various custom or pre-built Tatsu footers onto your website. Visit the Tatsu Footer doc to create a new footer.
Border Layout Settings : #
This option is relevant if you choose either Border Layout or Header Top Border Layout in the above Option.
3. BORDER BG – #
The Background Color for the Border around the Site can be Set here.
4. BORDER WIDTH – #
The Width of the Border can be set here. The default value will be 30px.
8. DISPLAY COMMENTS ON PAGES – #
Enable this option to Display Comments on Pages. By default Comments will be disabled
9. DISABLE CSS ANIMATION IN MOBILE DEVICES – #
Enable this option to Disable CSS animations on Modules in Mobile devices. Options to apply CSS animations is given in the Page Builder.
10. DISABLE DYNAMIC COLOR CHANGE ON SLIDER REVOLUTION – #
Enabling this option disables the dynamic color change of the navigation menu text color according to the slide.
11. DISABLE BACK TO TOP BUTTON – Click to Preview the Back to Top Button #
The Back To Top Button will appear in the Right Bottom Corner of the Screen. This enables the user to easily navigate back to the foremost section. This option can be used to enable/disable this button. This Button will take the Color that you set as ‘Color Scheme’ as Background Color and ‘Text Color on BG with Color Scheme’ as the Icon Color. These options can be found under the ‘COLORS’ Panel.
12. FORM FIELD STYLE – #
This setting will apply on any Form Fields that are used, ex. Textblock, Text Area etc. There are two styles that you can choose from
13. BUTTON SHAPE #
This option changes the shape of the button. The selected button shape will be applied on Blog Read More, Portfolio View Project, Comments Submit, Shop Pages and Contact Form Buttons. The available button shapes are default, rounded and circular.
14. CUSTOM SIDEBARS : #
Apart from the default Sidebars that come with the theme, you have the option to add Custom Sidebars. Follow the instructions below to create the Sidebars.
STEP 1 – Add the Sidebar Name and Click on ADD MORE

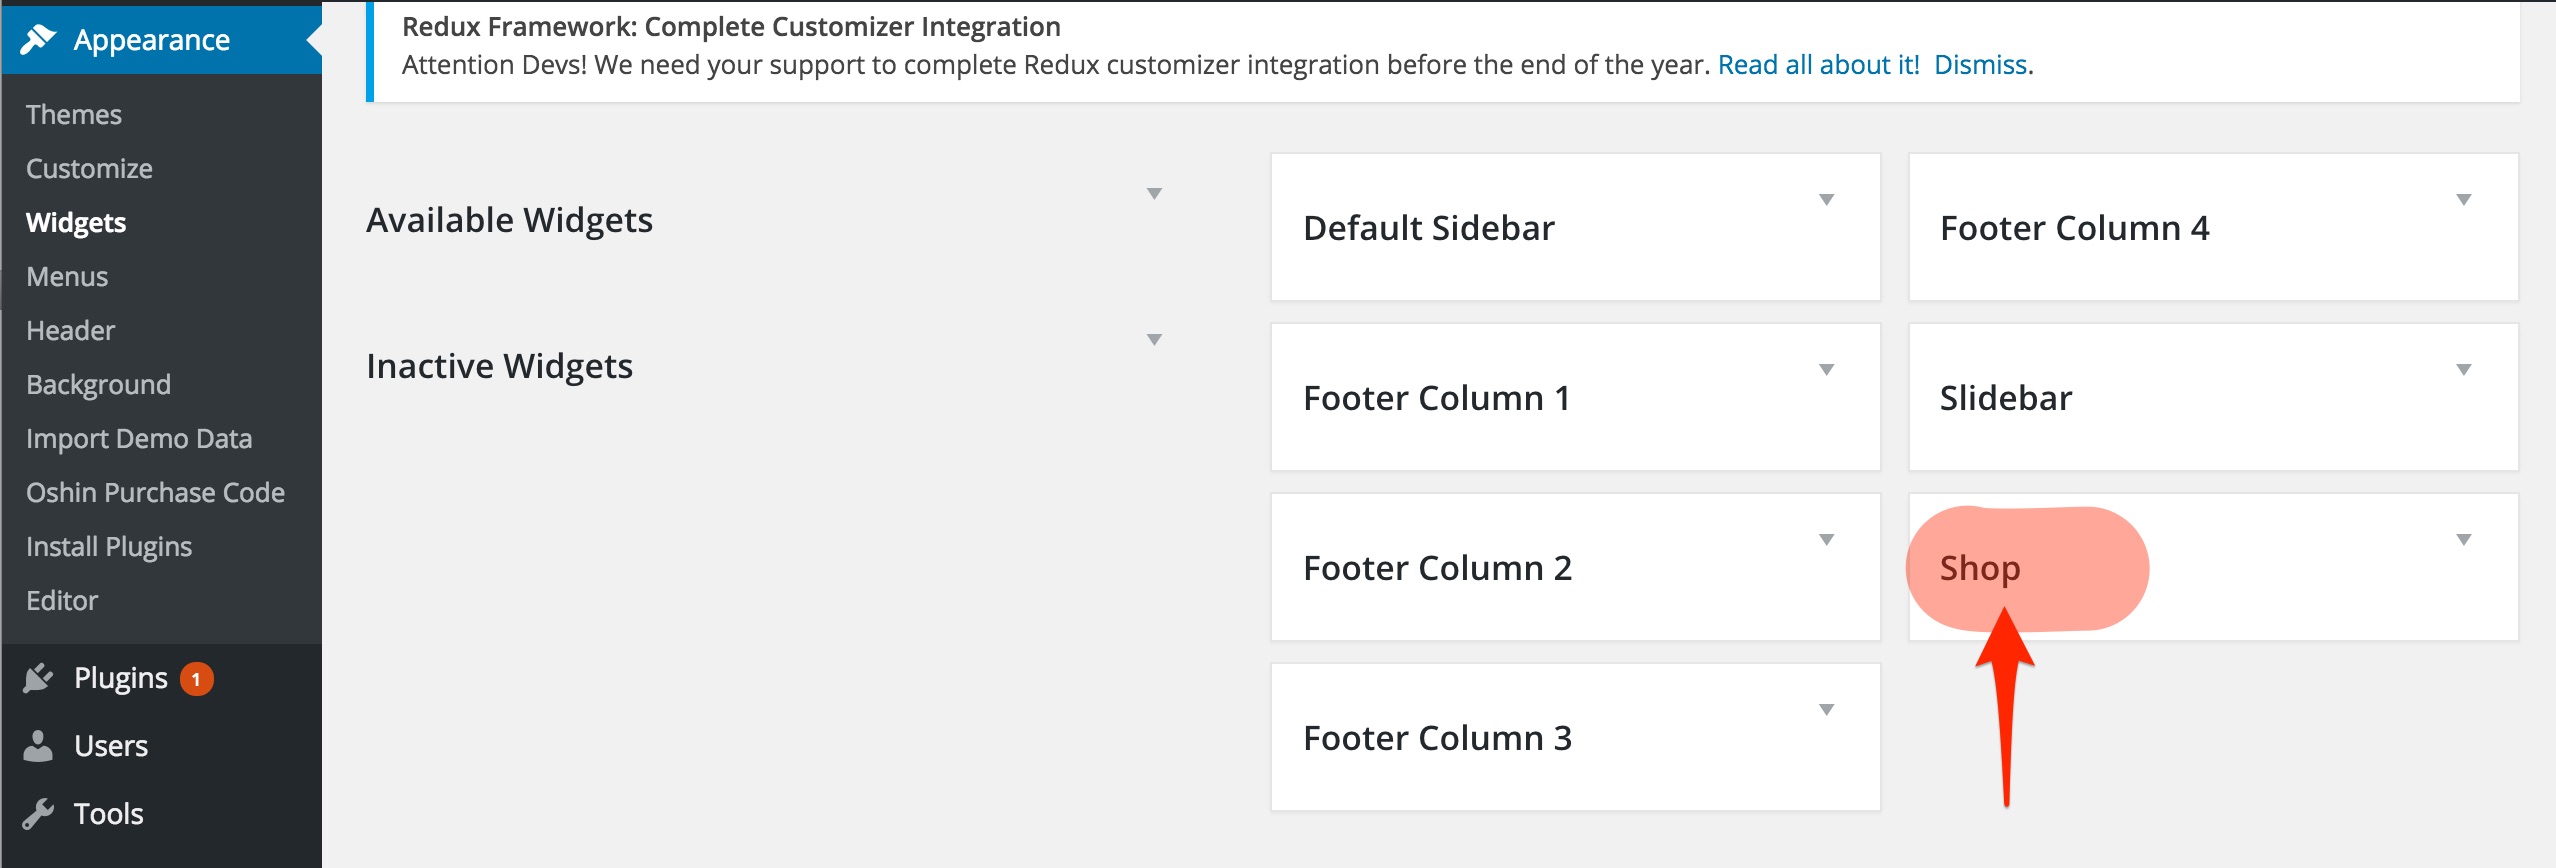
STEP 2 – Go to APPEARANCES > WIDGETS on your Dashboard. You will see the new Sidebar that you created.

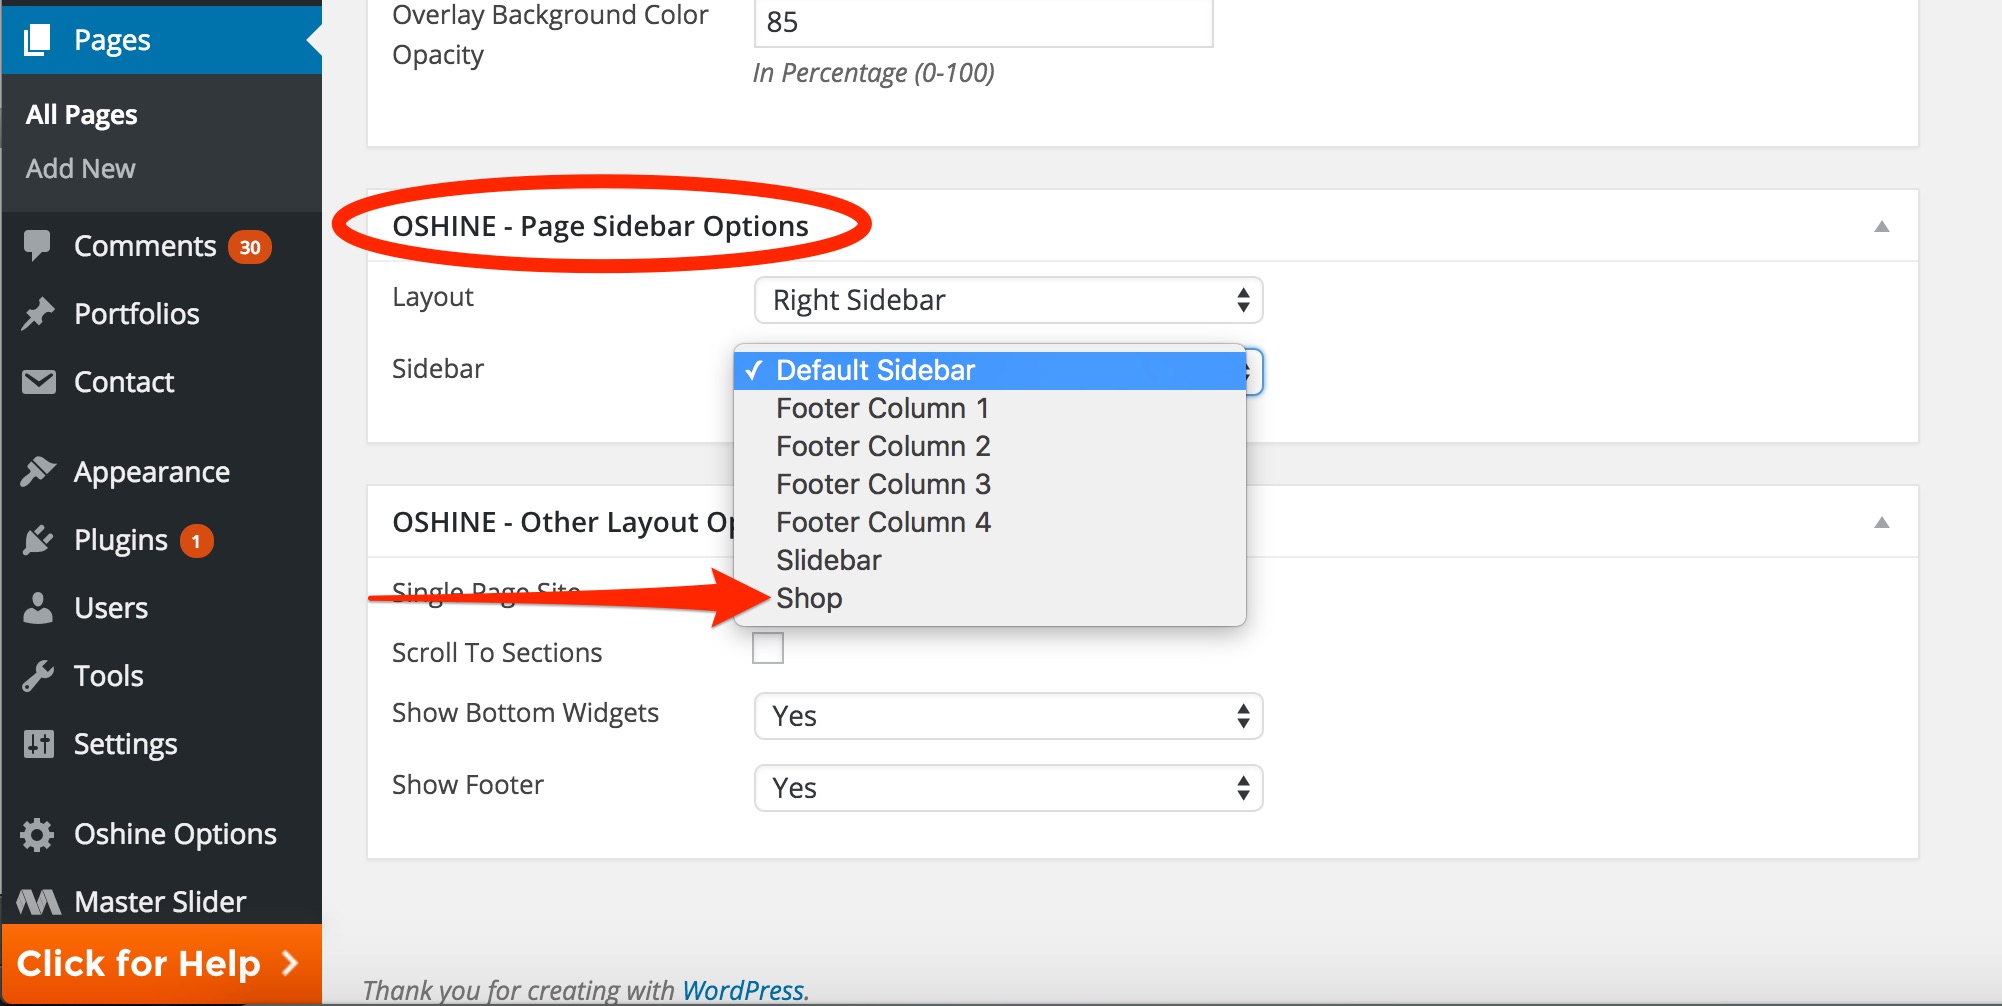
STEP 3 – To use the Sidebar on your page, go to the OSHINE – Page Sidebar Options metabox. You can find the option to pick the Sidebar to be shown in that page.


Maintenance Mode
Turn On Maintenance Mode:
Enabling this option turns on the Maintenance Mode, you can now go forward setting the Maintenance Mode Page.
Maintenance Mode Page:
From the drop-down select a page that you want to use as a splash page in maintenance mode. The selected page shows up when you’ve activated the maintenance mode.
15. INSTAGRAM ACCESS TOKEN – #
This Access Token is required for the Instagram Feed that will be pulled by the Gallery Module. Check the tutorial on How to Generate an Access Token.
16. GOOGLE MAP API KEY – #
This is required for using Google Maps in the site. Check the tutorial on How to generate your API Key.
17. CDN ADDRESS #
Add your cdn address here, if you are using one.


