Google Analytics is free, live, and gives you insights in real-time. Google Analytics will help you to keep a tab of all the content that receives views and shares. This data can be used to improve the level of influence of your website’s content.
The Google Analytics performance reports can provide you with information about the top viewed posts on your website. With this data, you can identify the most read and shared posts. From here you can assess what content generated the most views or shares, which will enable you to make necessary changes in your future blog post.
Steps to Generate Universal Google Analytics Tracking ID #
Step 1: Navigate to your Google Analytics Account #
If you don’t have a Google Analytics account then the very first thing you need to do is to create one. The Analytics service from google is free and provides you with deeper insights into the performance of your website.
If you have already set up your Google Analytics account then you can jump directly to Step 2.
Navigate to: https://analytics.withgoogle.com/ and hit the USE IT FOR FREE button on the page. This will ask you to choose the Google Account to proceed further.
If it’s your first time signing up for the Analytics account then you will be greeted with a Welcome Screen, here you will need to click on the Start measuring button to proceed further.

The next screen will tell you to add account details like the account name and account data sharing settings go through all the text mentioned and choose the appropriate setting.
Step 2: Creating a New Property/ Property Setup #
If you are an existing Google Analytics user you need to navigate to Admin Settings > Create Property. Click the Create Property button as shown below.
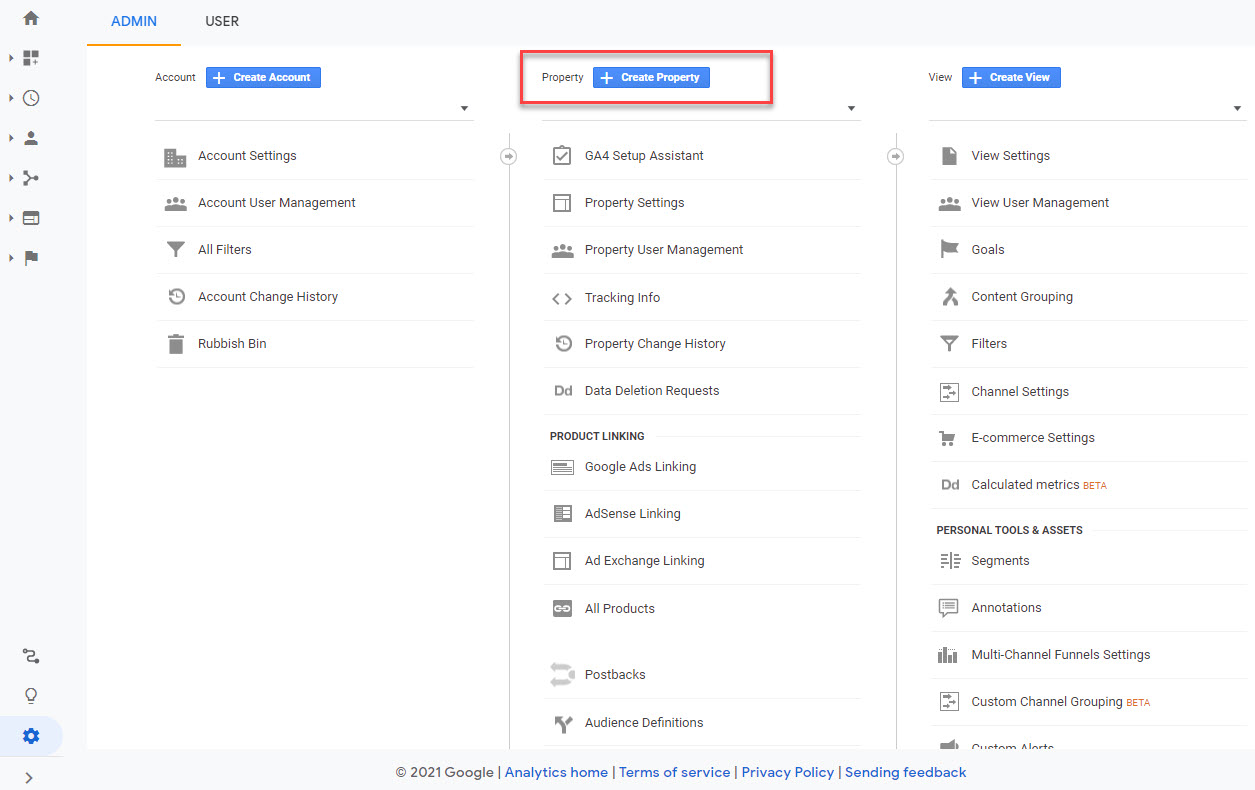
Now, you need to create a new property.
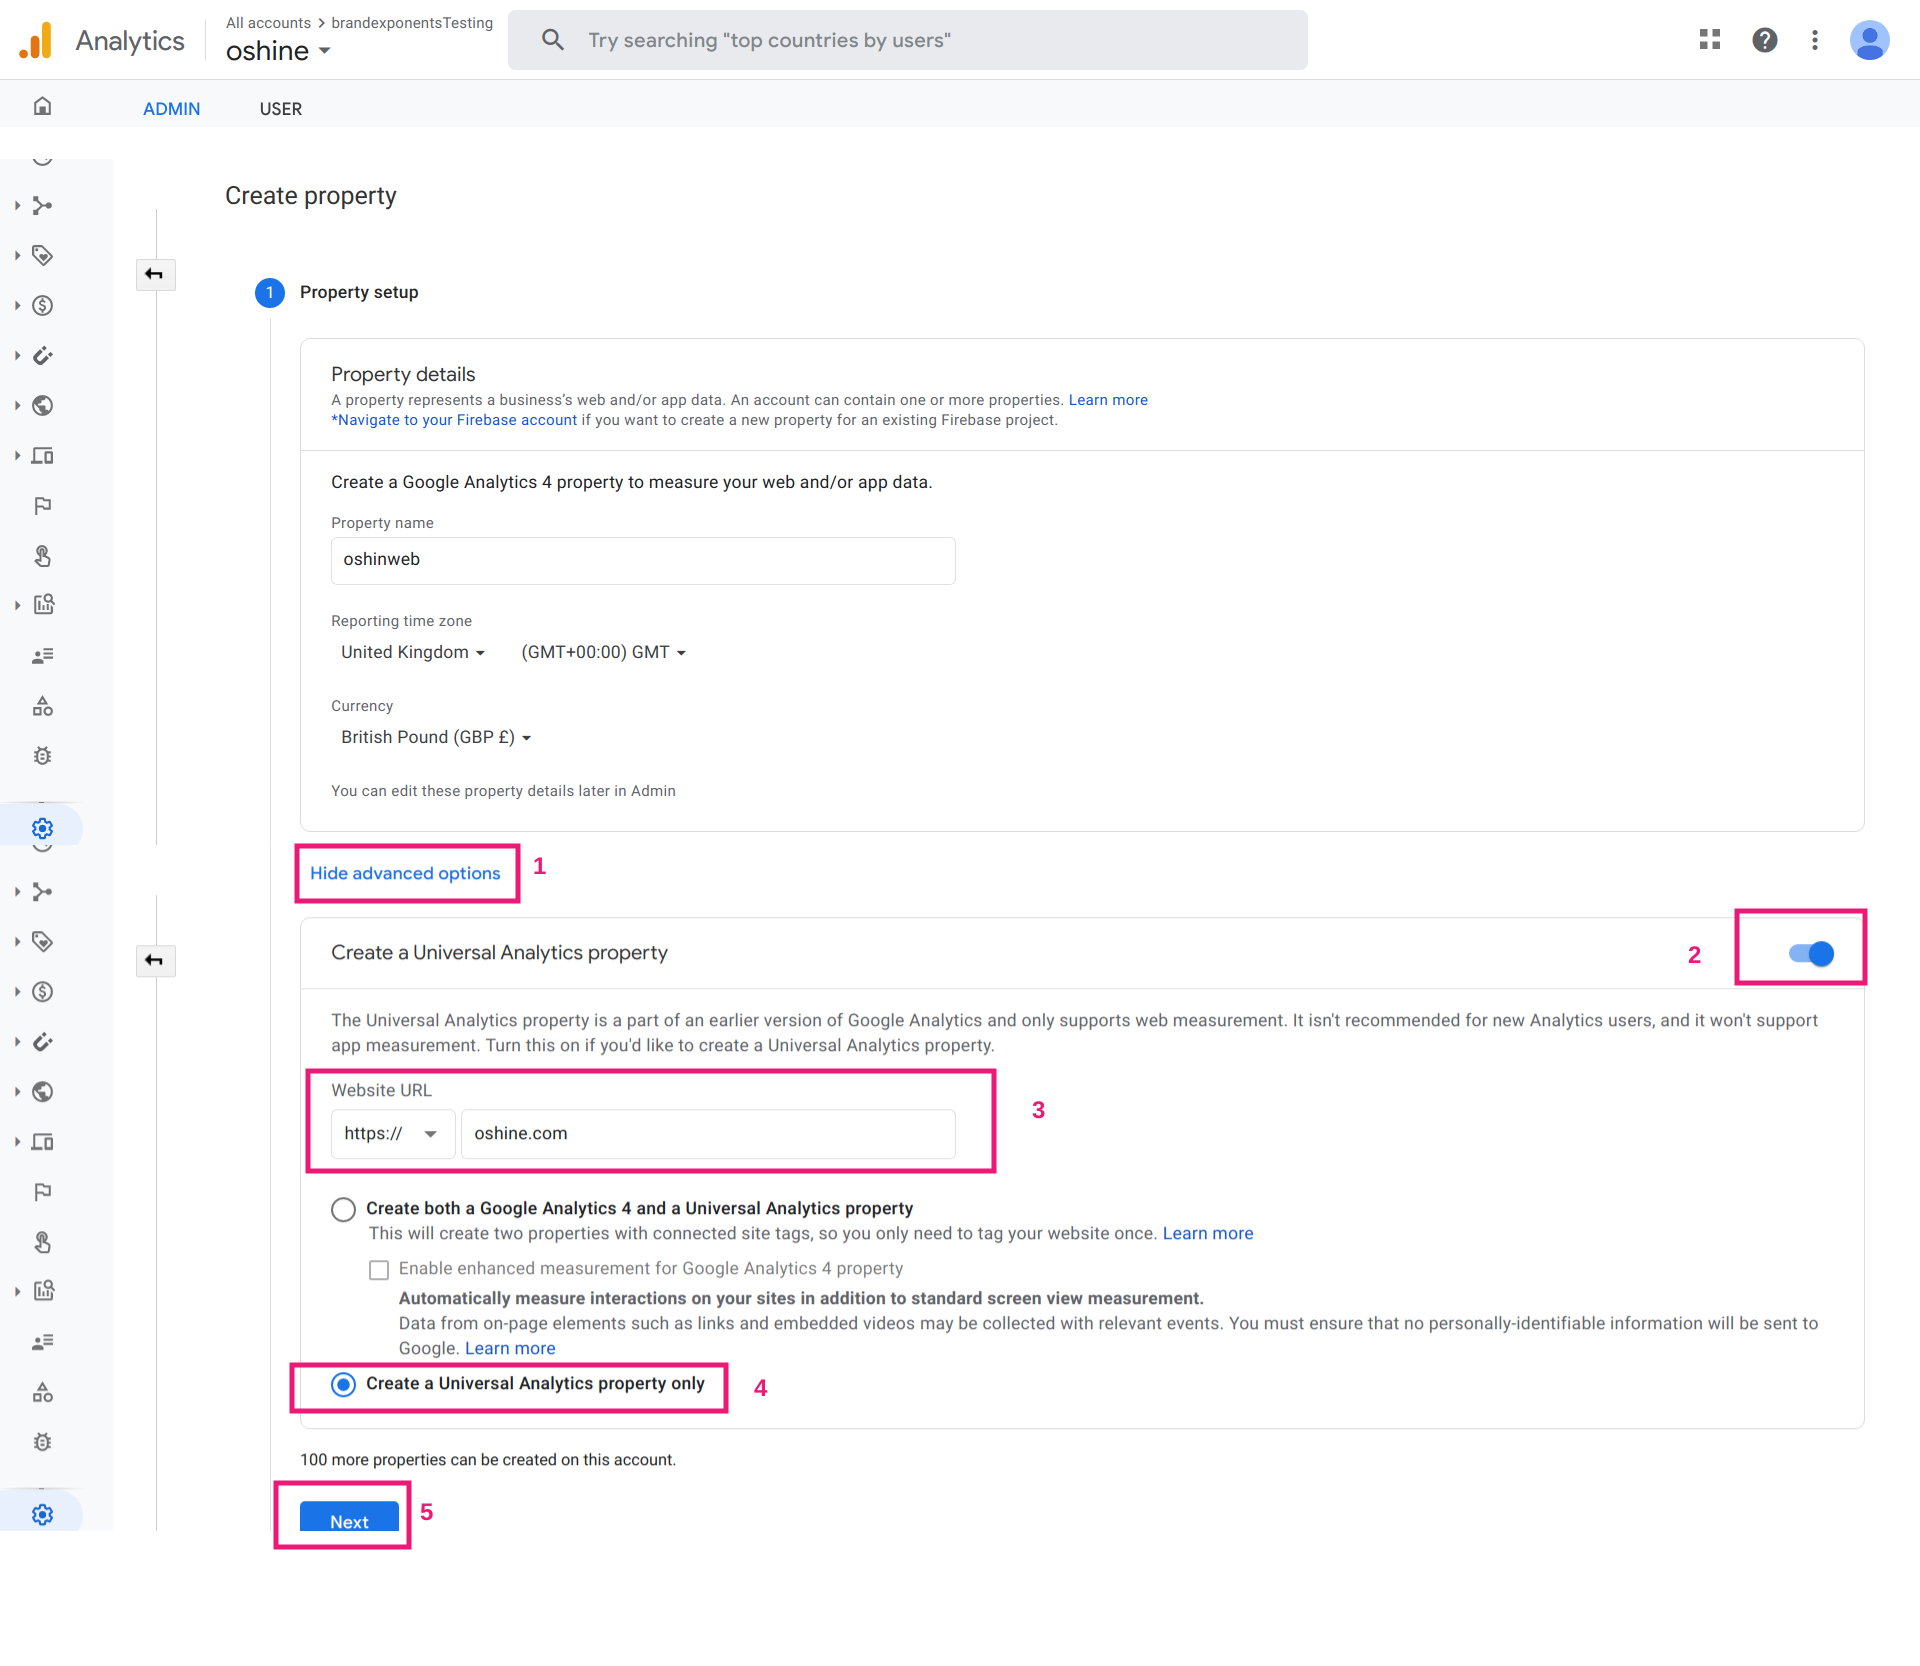
- Add a property name. You can give any name you want. Choose the appropriate reporting time zone and currency or keep it with its default selection.
- Click on Show advanced options and enable Create a Universal Analytics property section.
- Type in your website URL into the website URL blank field.
- Click on Create a Universal Analytics property only option and hit the Next button.
Add in the required Business Information such as Industry Category, Business Size, and tick the option for which you intend to use the analytics service. Click on Create Button once done.
Step 3: Copy the Google Analytics Tracking ID #
After creating your new property you will be provided with all the details associated with the newly created property including the Tracking ID.
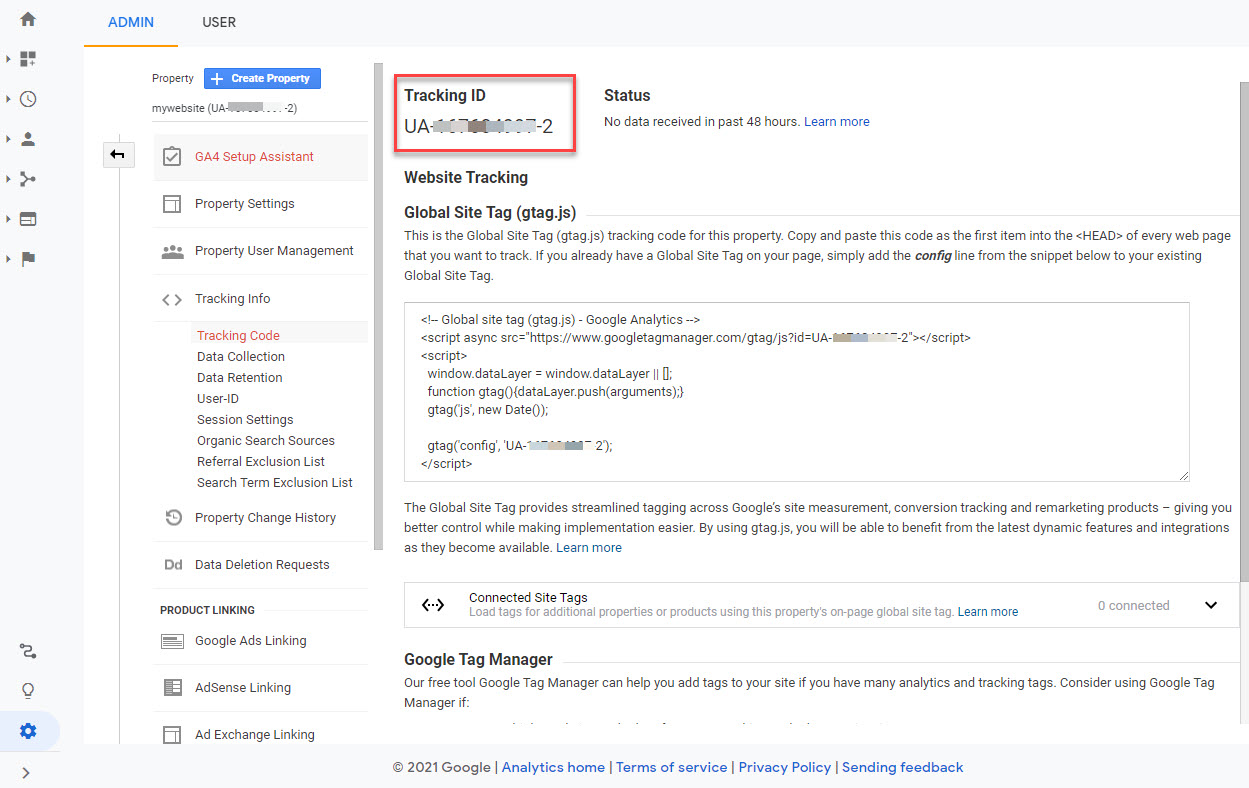
You need to copy the Tracking ID [Example: UA-xxxxxxxxx-1] to paste it on your Oshine Theme.
Step 4: Pasting the Tracking ID #
After copying the Tracking ID you need to paste it on your website. From your WordPress admin panel, goto Oshine Options > General Settings > Google Analytics Code.
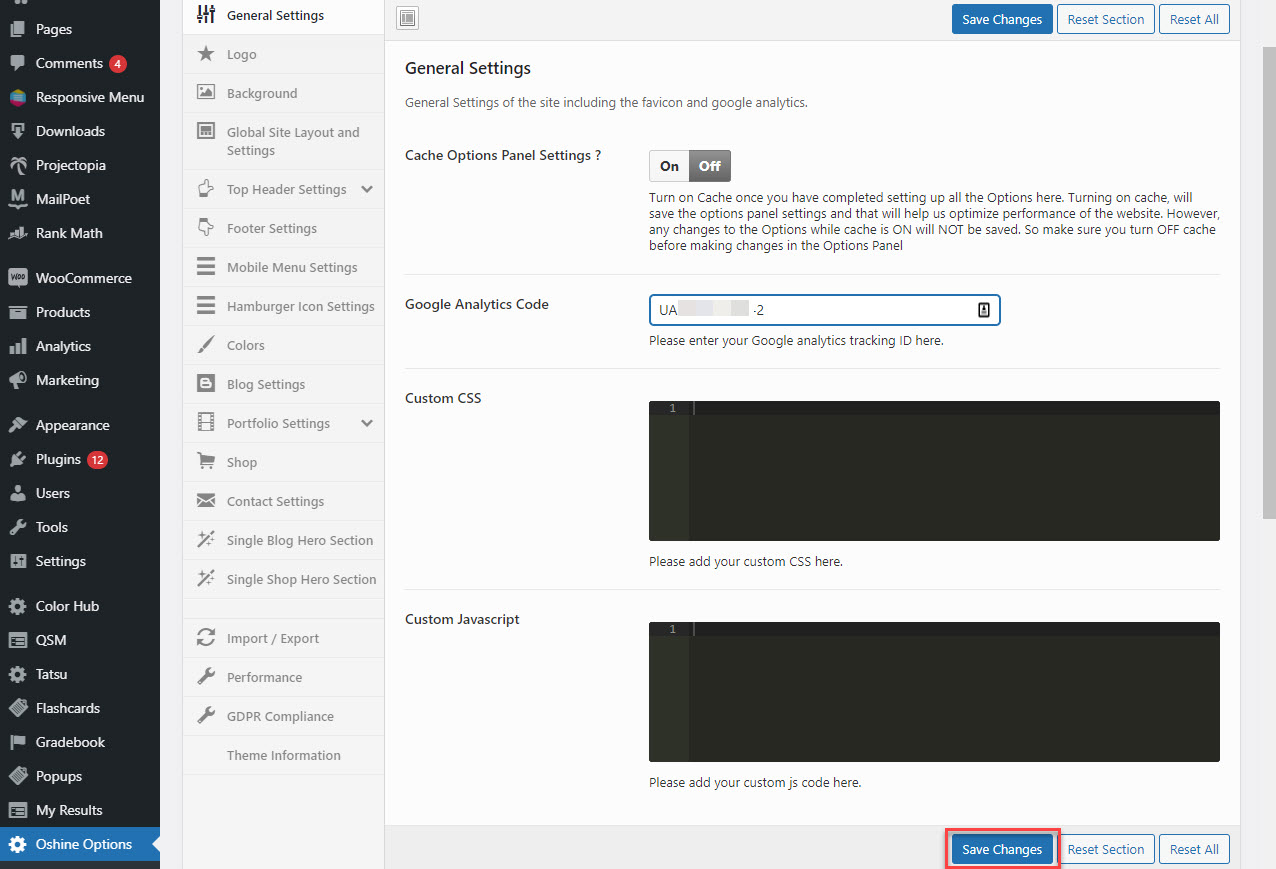
And paste the copied code inside the blank field where it says Google Analytics Code. After pasting the code click on the Save Changes button. And you are done.
Step 5: Check Analytics Data in Google Analytics Dashboard #
After successfully pasting the code and saving the changes you now need to verify the same.
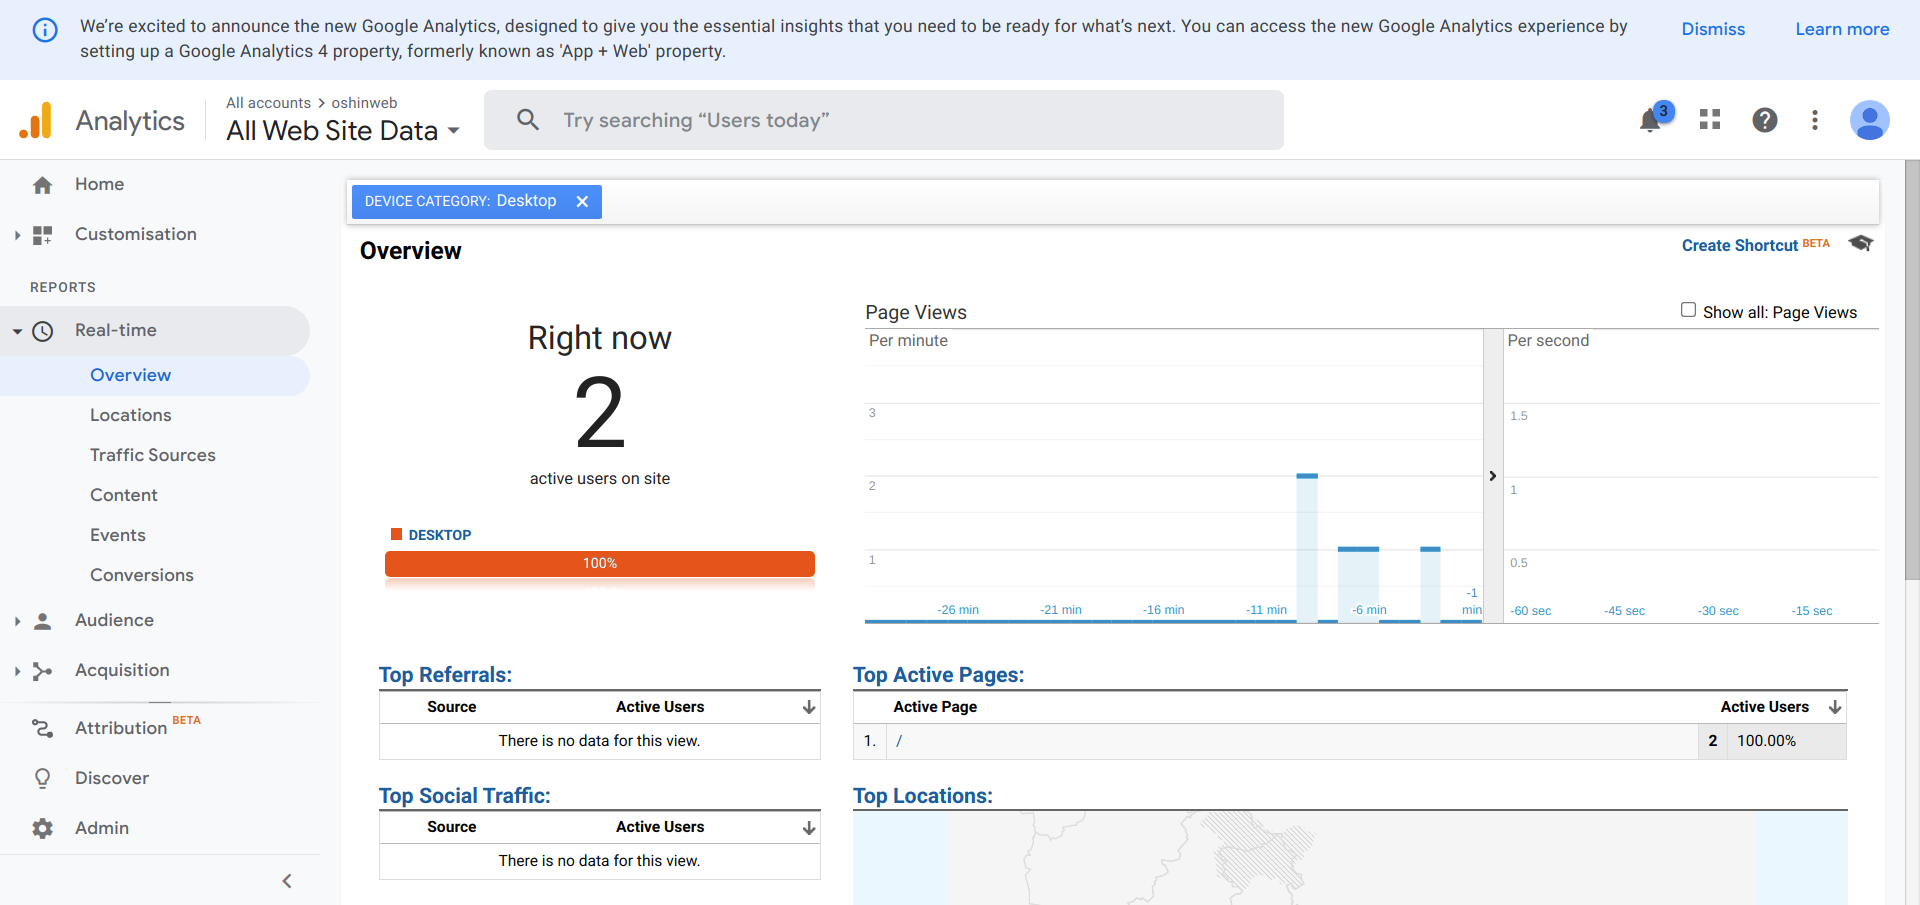
To verify if the code is working correctly and accepting data from your website, you need to open your Google Analytics Dashboard and check for the activity data.
If you are seeing the real-time page views and active users status then all is good and you have successfully linked Google Analytics Service with Oshine Theme.


